Advanced Macro Editing
Advanced Properties
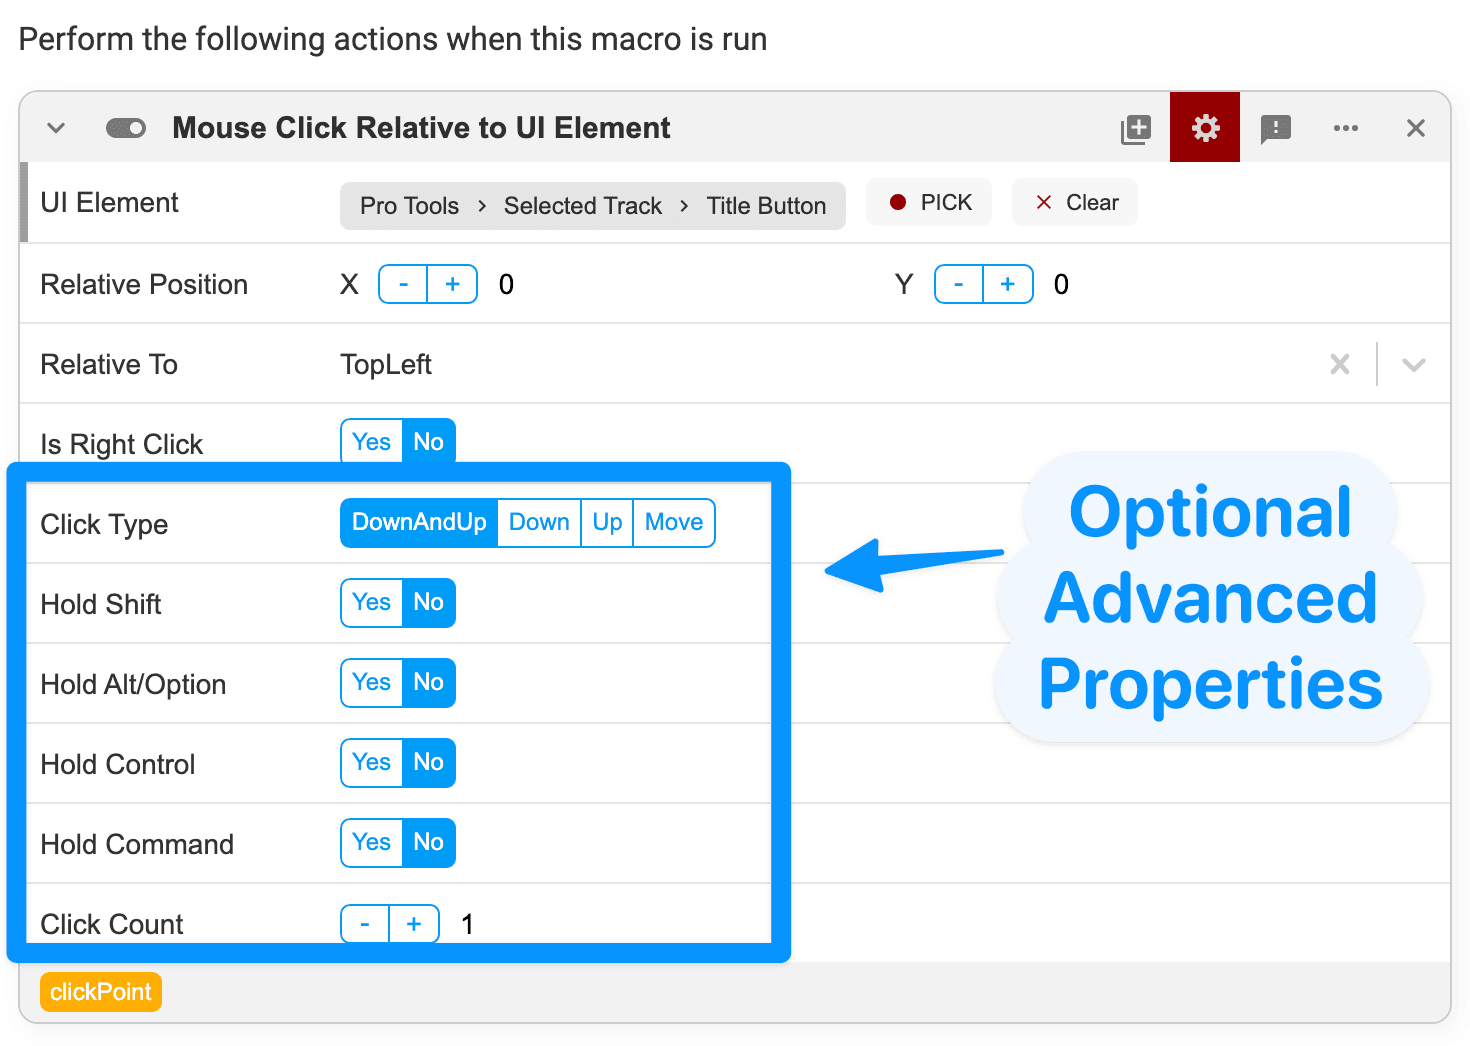
Some macro actions in SoundFlow have "Advanced Properties" available. You can access these properties by clicking the gear icon at the top right corner of the macro action.
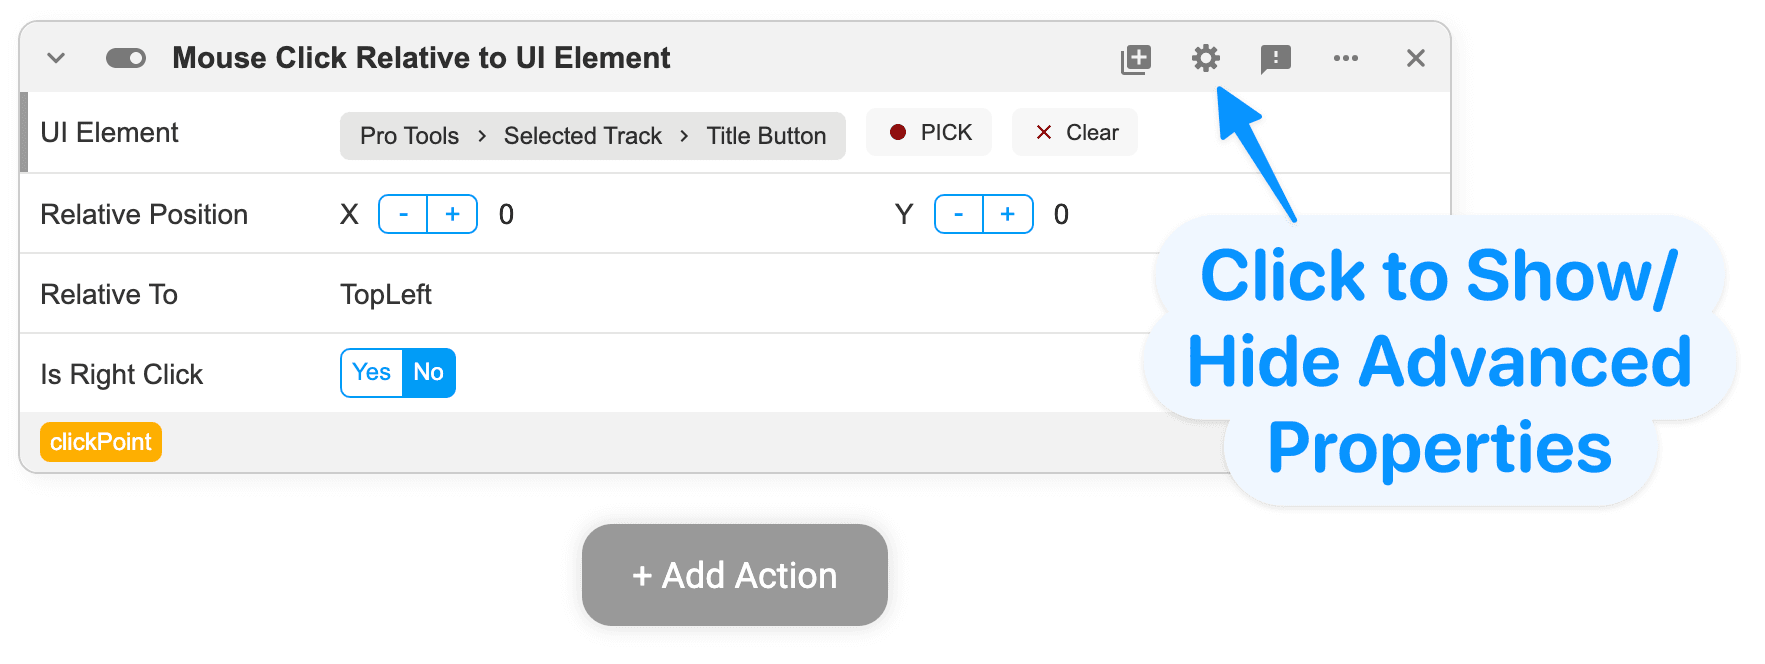
Example of Advanced Properties:
For a more in-depth example, watch the following Live Coding Video. The most relevant section starts around 5:36:
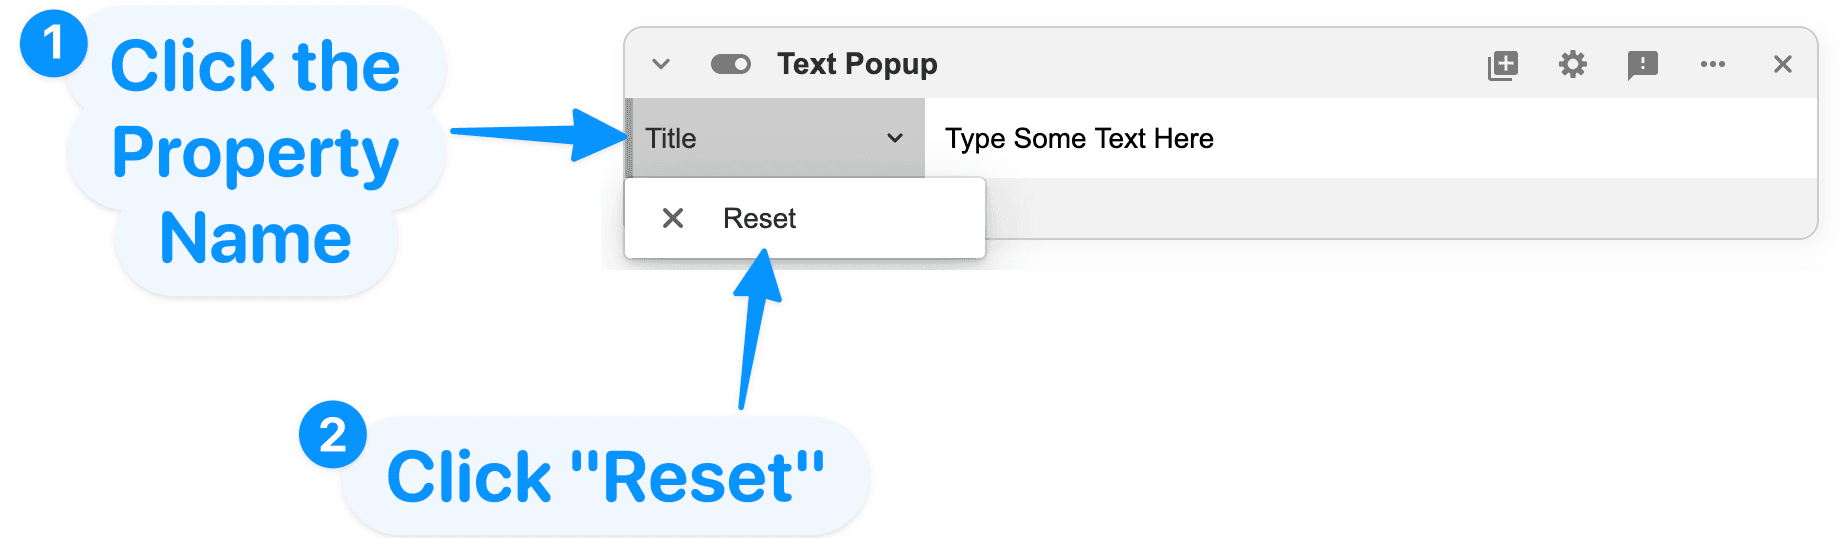
Reset to Default Values
When editing a macro action, a property can be reset to a default value, if provided, by clicking on the property name and then clicking "Reset."
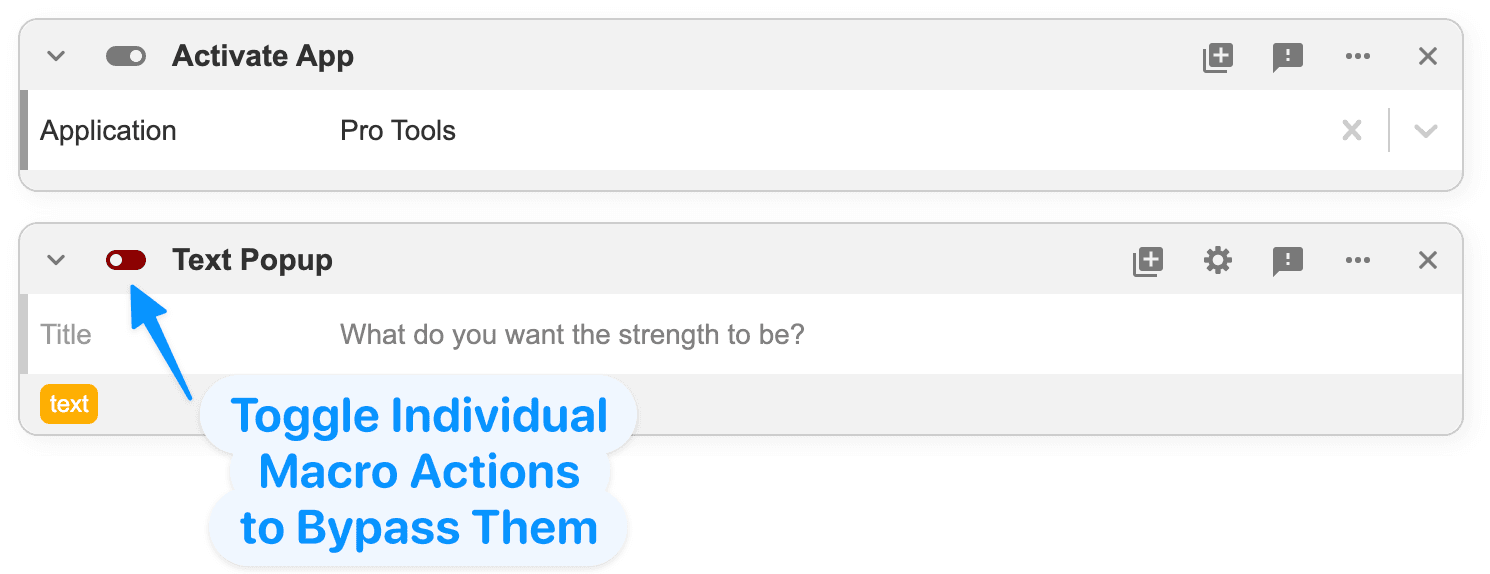
Toggle Actions On and Off
Macro actions can be individually toggled on and off using the "toggle" switch at the top left of the macro action. Macro actions toggled off will be skipped when the macro is run.
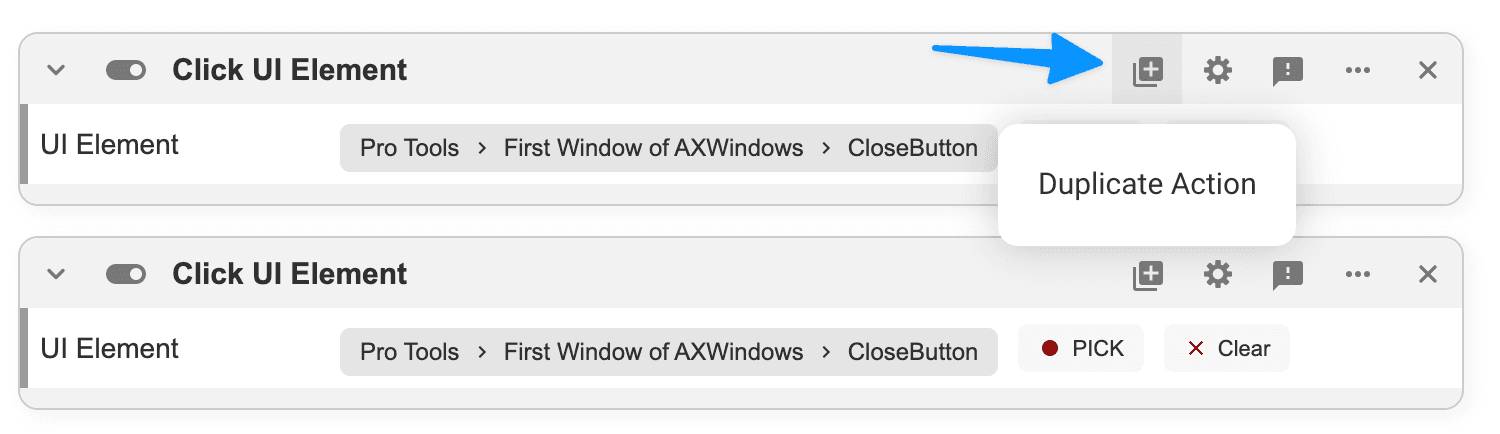
Duplicate Actions
Macro actions can be duplicated using the "Duplicate" button at the top right of the macro action.
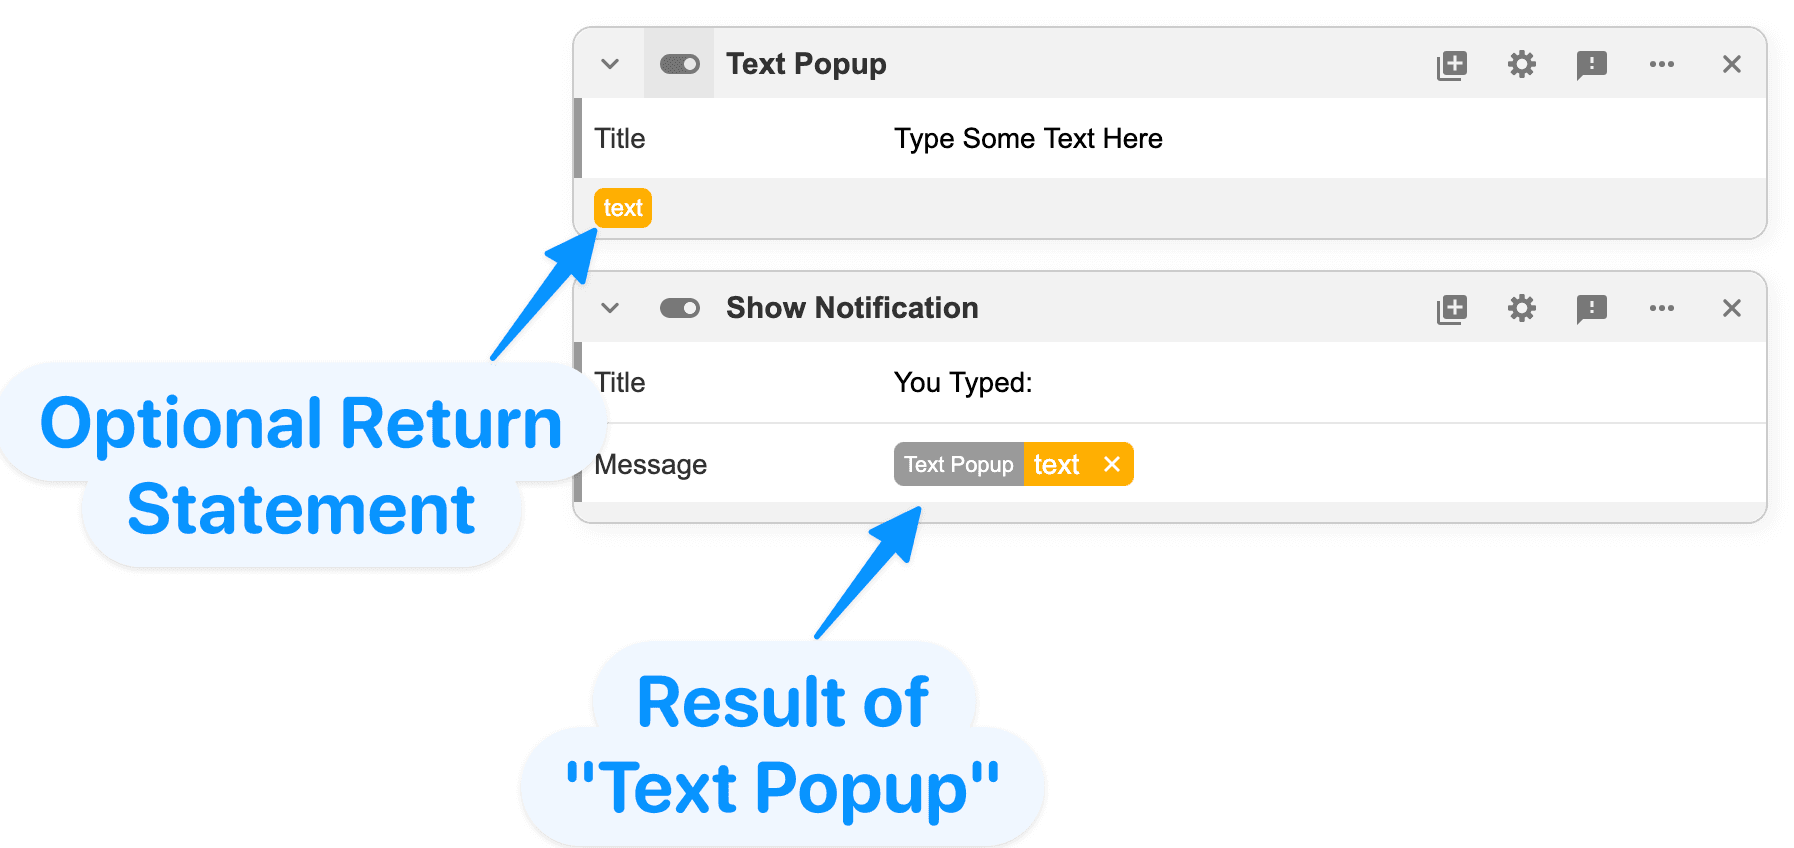
Return Values
Some macro actions in SoundFlow will provide an optional return value. This return value is shown as a yellow variable name at the bottom of the macro action.
These return values can be dragged to other macro actions and used as variables.
In the example below, the yellow "text" variable from the bottom of the "Text Popup" macro action has been dragged to the "Message" field of the "Show Notification" macro action.
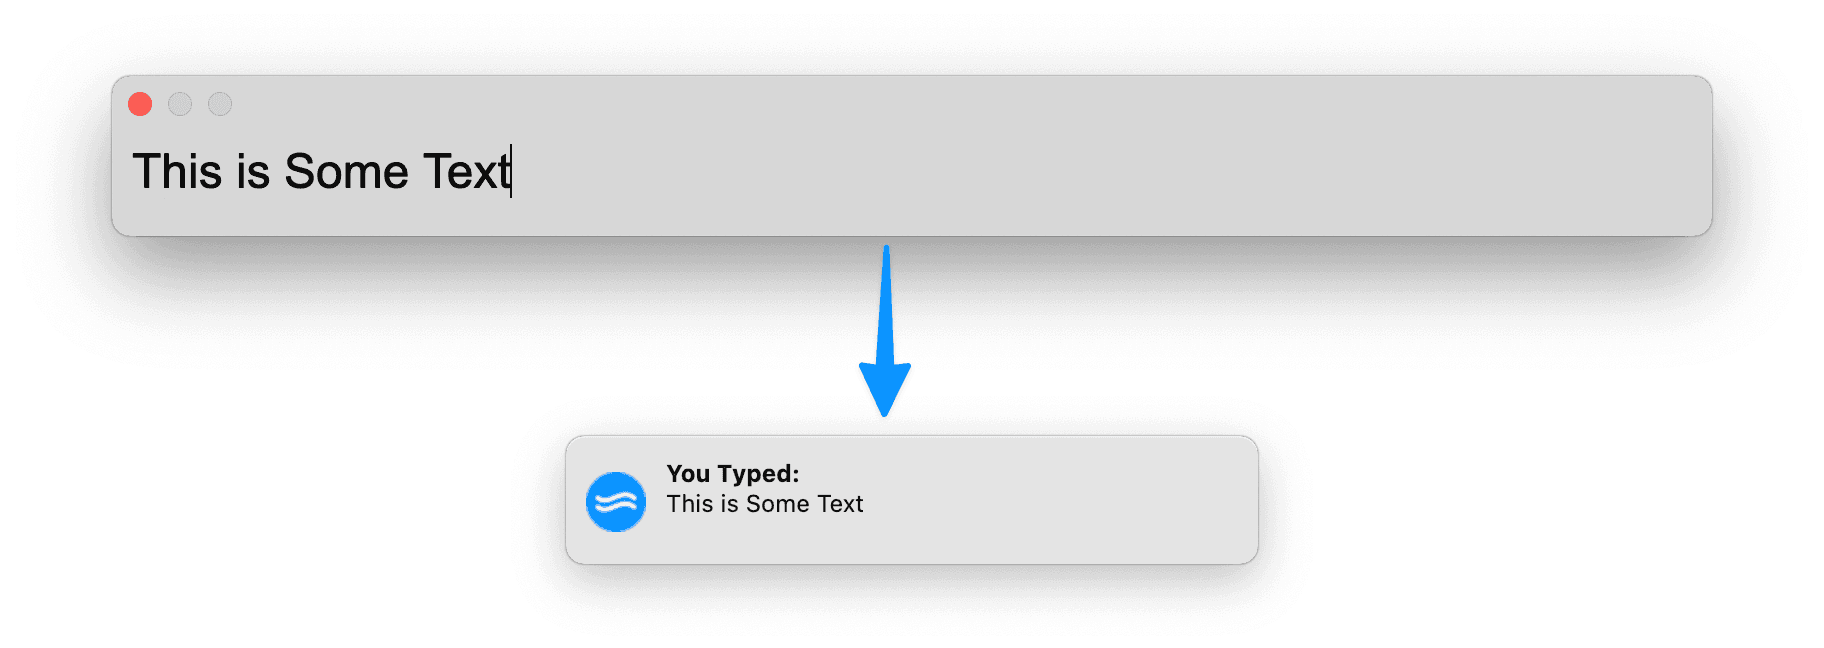
When this macro is run, the user will be prompted to type text in the text popup. That text is then used to show a notification with the exact text that the user provided.
For a more in-depth example, watch the following Live Coding Video. The most relevant section starts around 2:45:
Copy as JavaScript
Individual macro actions can be copied as JavaScript by clicking on the "…" button at the top right of the macro action. This can often be a learning tool for new users of JavaScript.
Users comfortable with coding may find this feature particularly helpful when using a "Click UI Element" macro action to select a more generalized UI Path and then copying that path to a larger script.
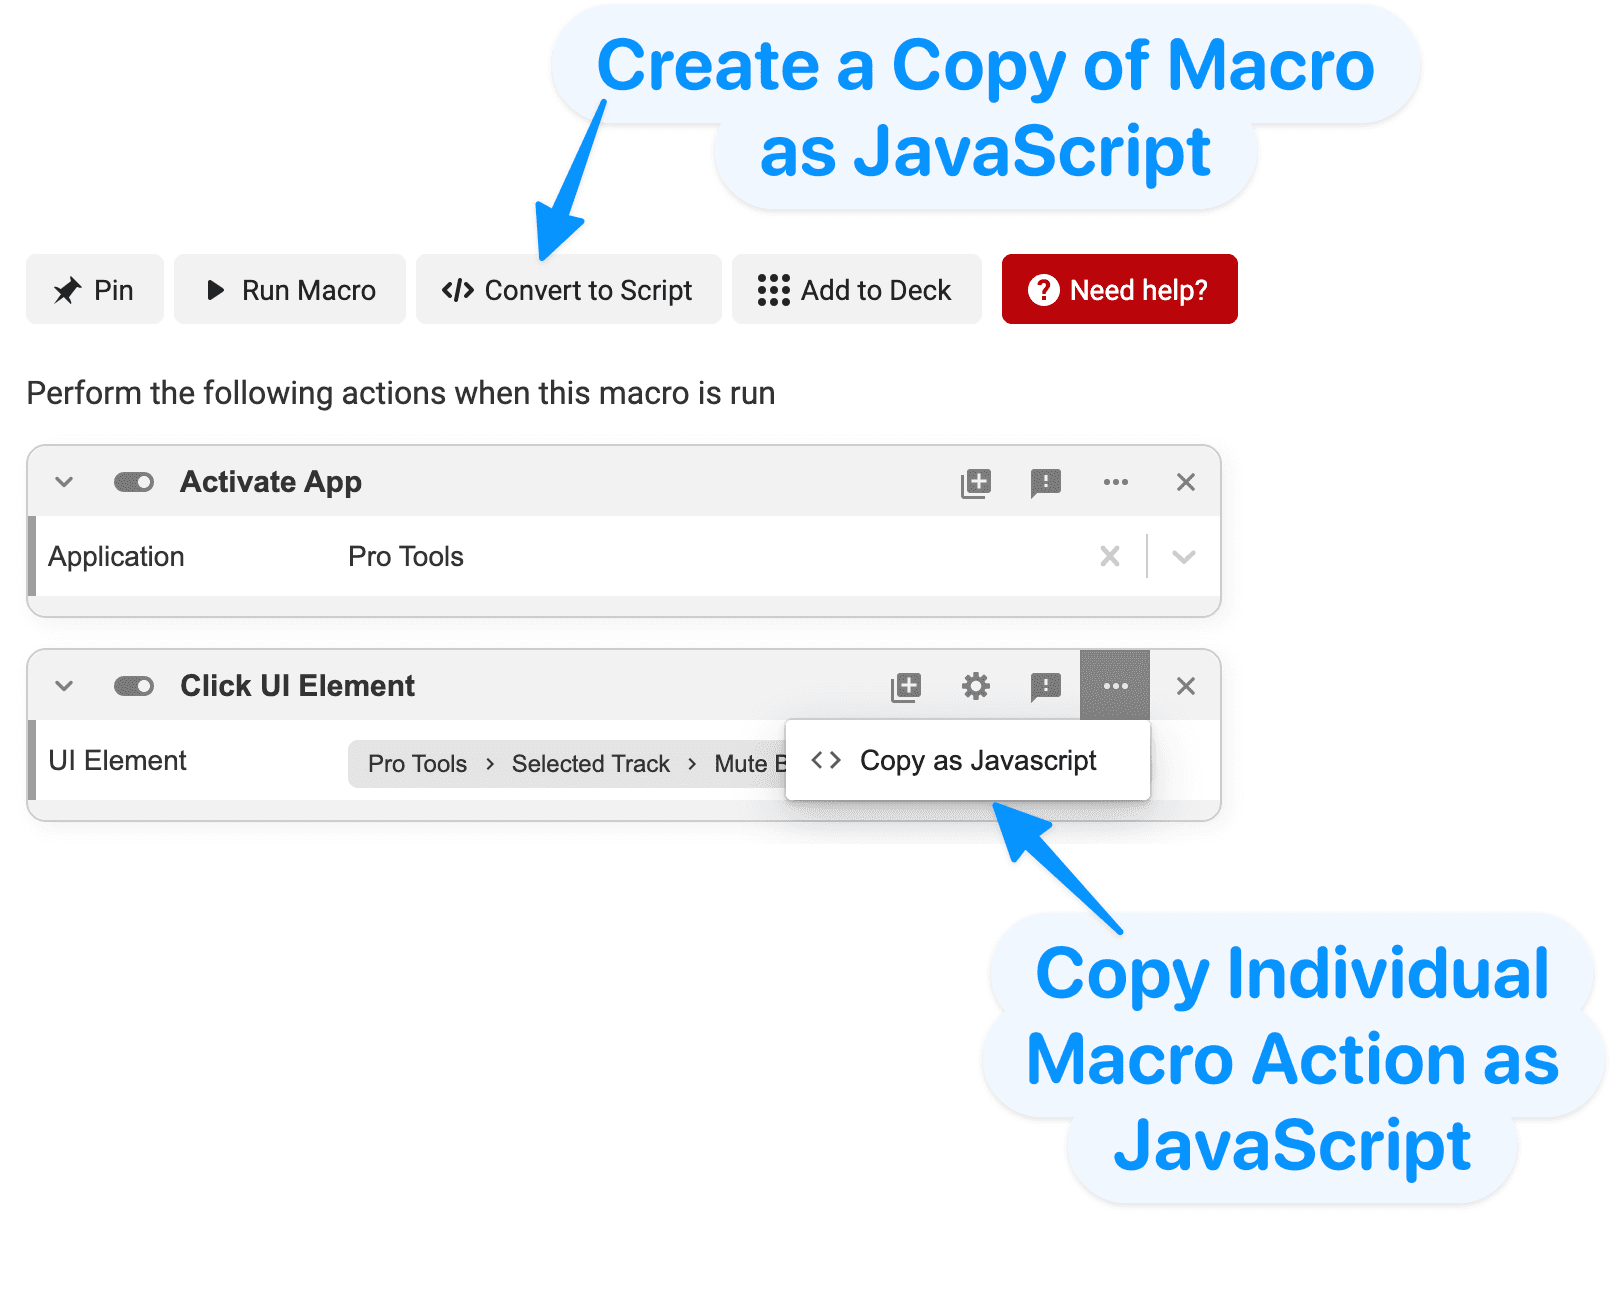
Also, note that any macro in SoundFlow can be converted to a script by clicking the "Convert to Script" button in the SoundFlow Editor.
Finding Static Paths to UI Elements
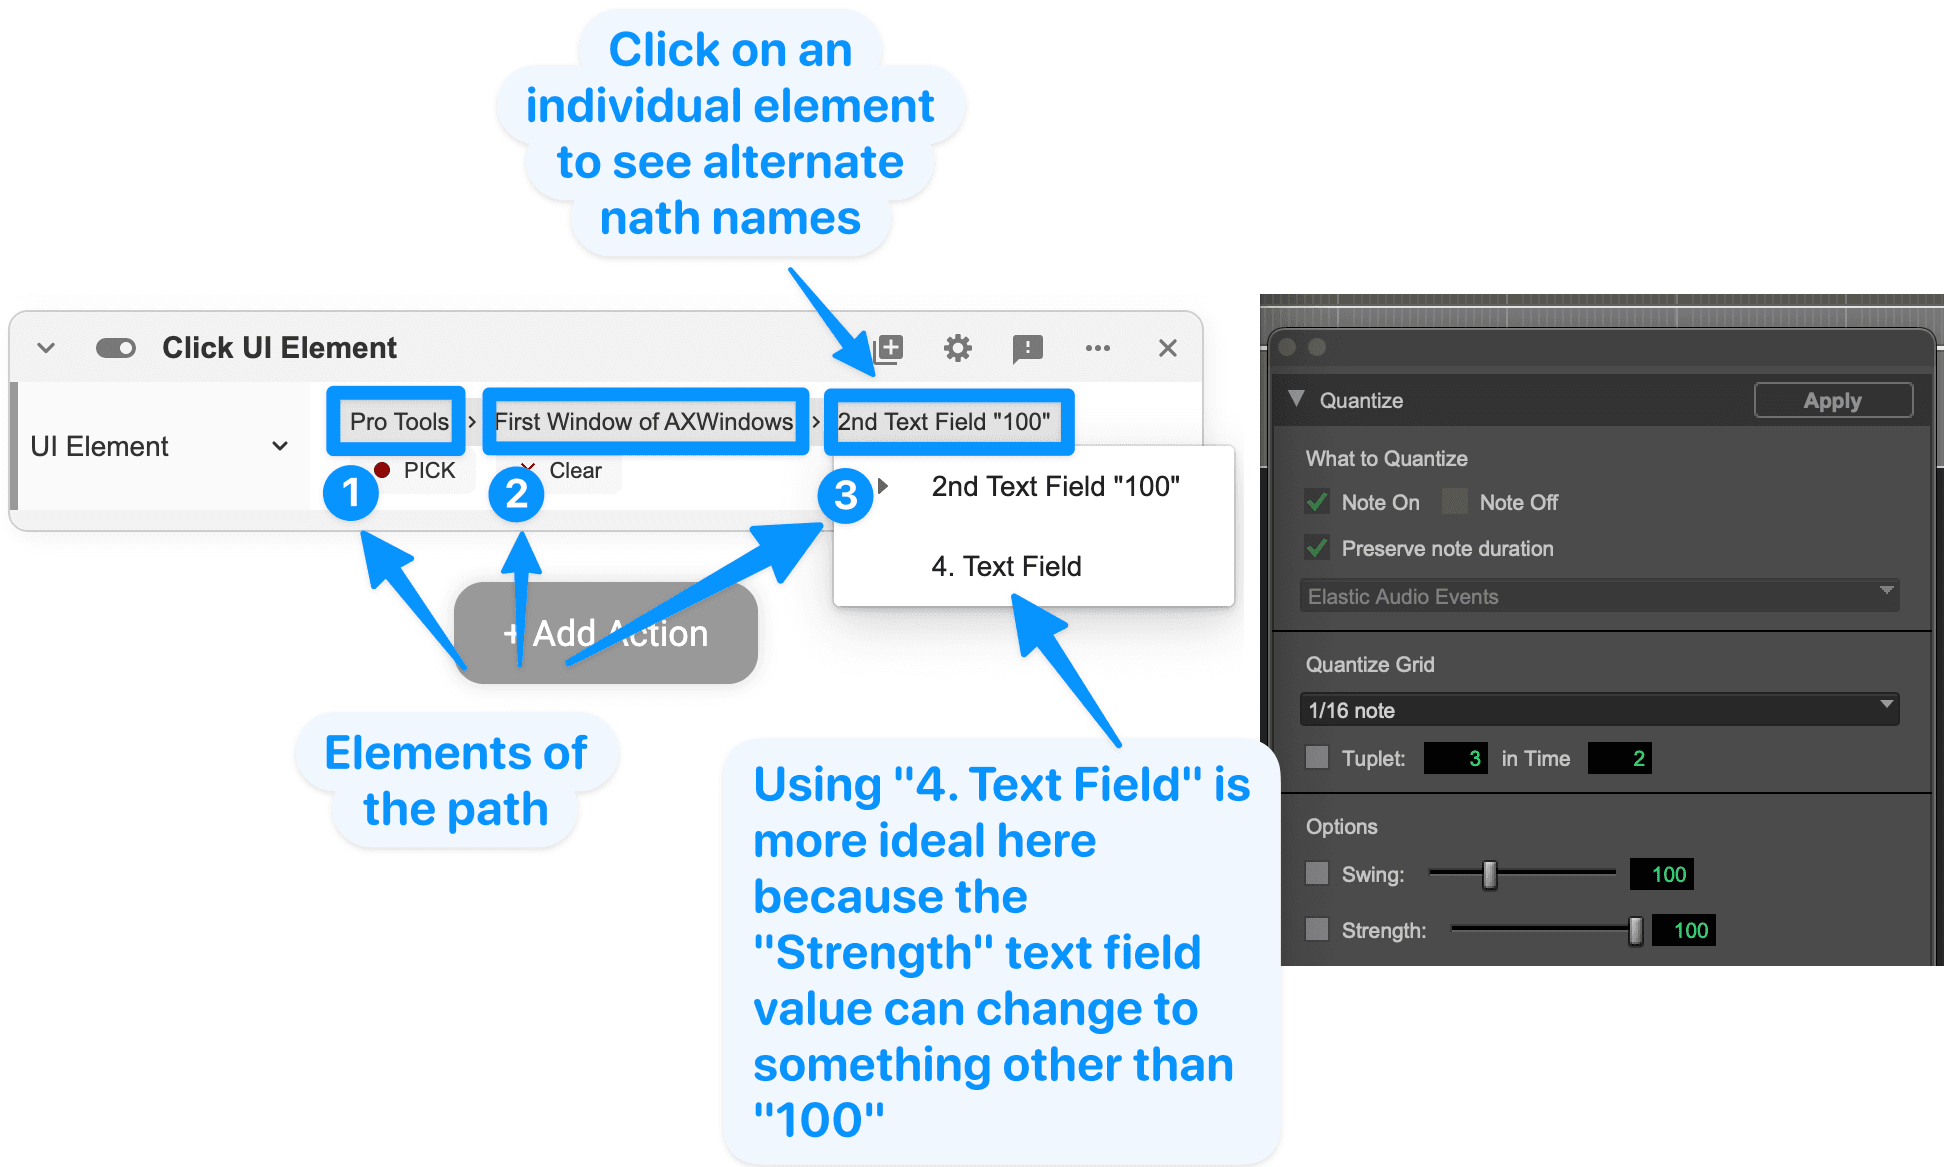
When using the "Pick" button in macro actions like "Click UI Element," the individual elements of the resulting path can be changed. Often, the most static version of a UI path is optimal.
For example:
- In Pro Tools, open the "Quantize..." settings via the Event Operations Window by clicking Event > Event Operations > Quantize... from the menu bar.
- In SoundFlow, create a macro with a "Click UI Element" macro action.
- Click the "Pick" button to enter "Pick" mode. Switch to Pro Tools with Command+Tab and select the "Strength" text field from the Event Operations Window in Pro Tools. This is the 4th Text Field in the window, often with a default value of "100."
- The resulting path in SoundFlow's "Click UI Element" macro action will likely default to Pro Tools > First Window of AXWindows > 2nd Text Field "100"
- Click on the text 2nd Text Field "100" to reveal alternate naming options.
- In this case, using 4. Text Field to reference the fourth text field will be more consistent than using 2nd Text Field "100" which requires the "Swing" and "Strength" text fields to be set to "100."
- Select 4. Text Field
Hold Command to Pick Elements Within Popup Menus
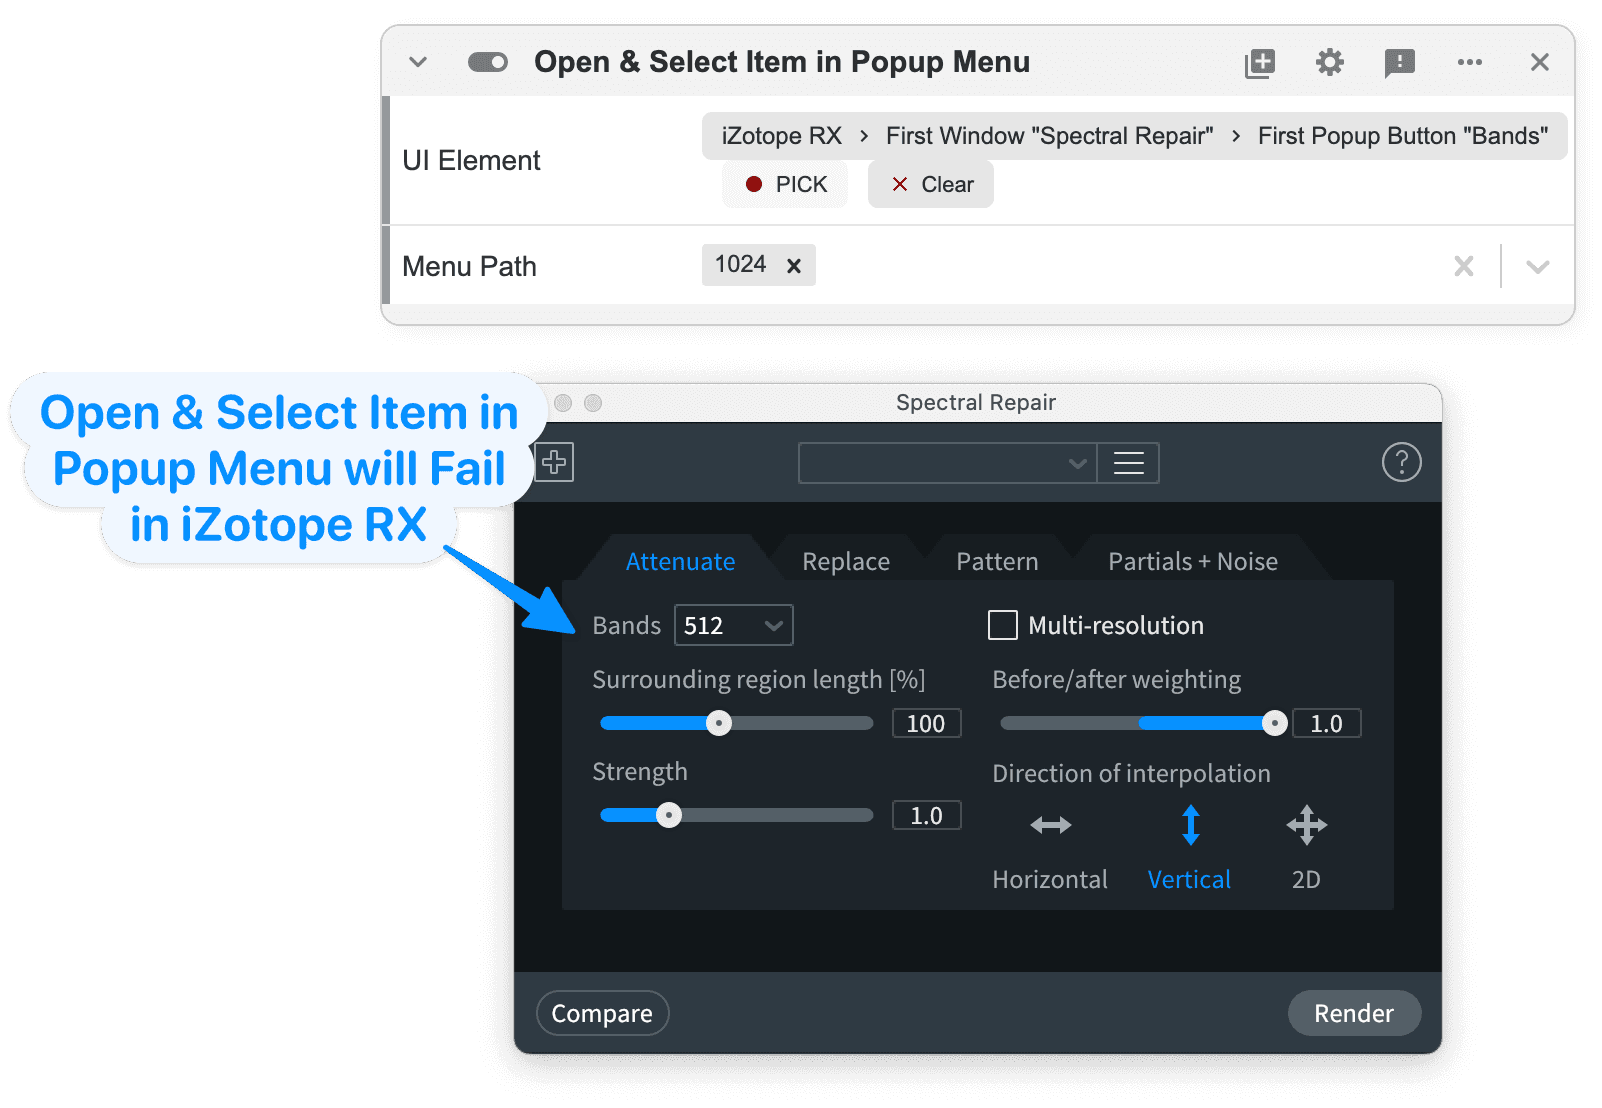
Some popup menus will not respond correctly to the "Open & Select Item in Popup Menu" macro action.
For example:
- In iZotope RX, open the "Spectral Repair" module by clicking Modules > Spectral Repair... from the menu bar.
- In SoundFlow, create a macro with a "Open & Select Item in Popup Menu" macro action.
- Click the "Pick" button to enter "Pick" mode. Switch to iZotope RX with Command+Tab and select the "Bands" dropdown menu for the Spectral Repair Module in iZotope RX (clicking "512" in the image below).
- "Pick" mode is exited once your mouse is clicked.
- In SoundFlow, Put "1024" as the Menu Path.
- Run the action
- The macro will fail. It will open the popup menu, but it will not select "1024" as desired.
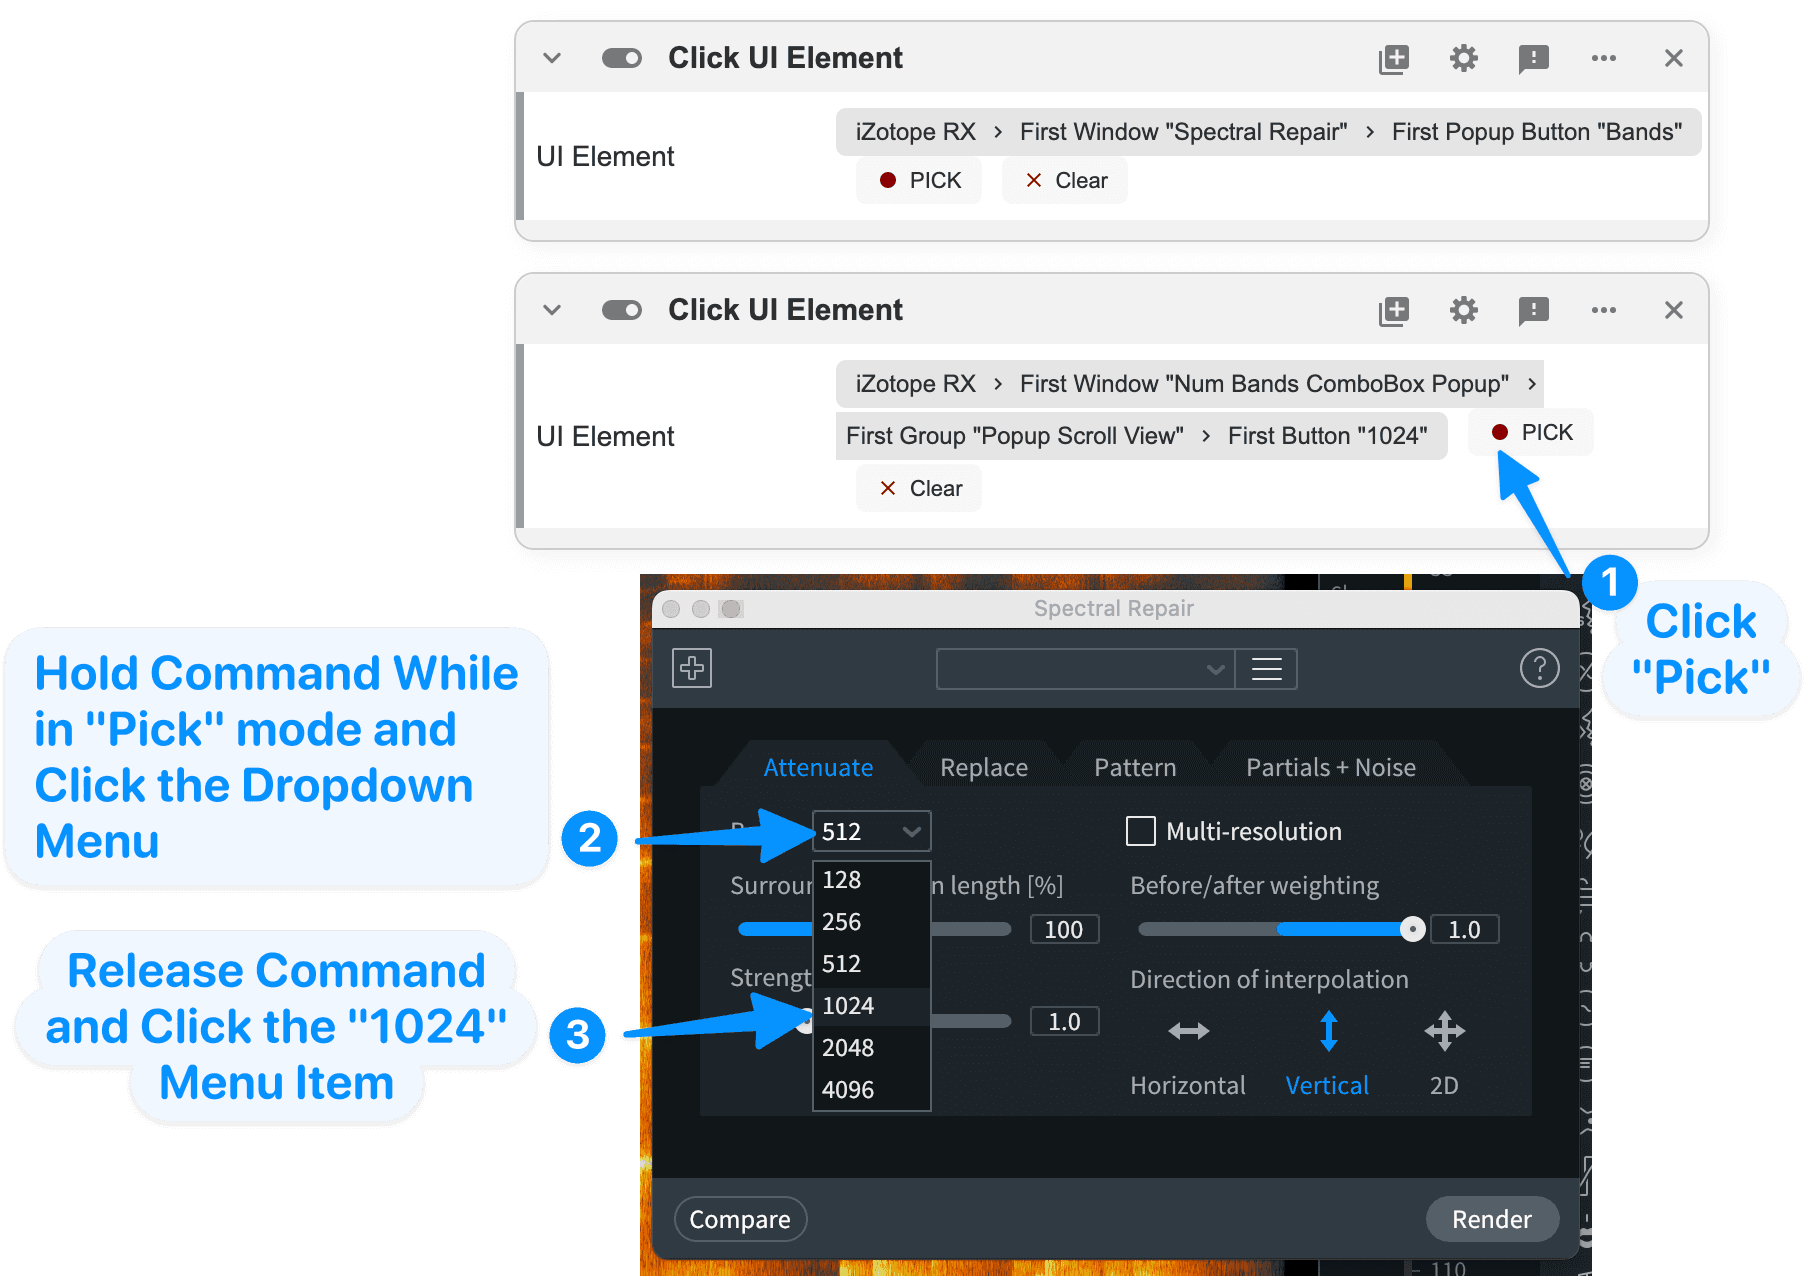
As an alternate approach, when using the "Pick" button in macro actions like "Click UI Element," holding Command will allow you to click elements in the target application without exiting "Pick" mode. This will enable you to select menu items within popup menus with the UI Picker.
For example:
- In iZotope RX, open the "Spectral Repair" module by clicking Modules > Spectral Repair... from the menu bar.
- In SoundFlow, create a macro with a "Click UI Element" macro action.
- Click the "Pick" button to enter "Pick" mode. Switch to iZotope RX with Command+Tab and select the "Bands" dropdown menu in iZotope RX (clicking "512" in the image below). This first "Click UI Element" action will open the desired popup menu.
- Add a second "Click UI Element" macro action to the macro.
- Click the "Pick" button on the second "Click UI Element" action to enter "Pick" mode. Switch to iZotope RX with Command+Tab
- This time, hold Command while clicking the "Bands" dropdown menu. SoundFlow will keep "Pick" mode active, and the "Bands" popup menu options will be shown.
- Now, release Command and click the menu item "1024" from the popup menu.
- The "Pick" mode is exited, and this completed macro will now select the correct "Bands" setting from the Spectral Repair module when it is run.
For a more in-depth example, watch the following Live Coding Video. The most relevant section starts around 3:30: