Create your own macros in SoundFlow
In this article I'm going to walk you through how to create your first Macro in SoundFlow.
Create a Macro
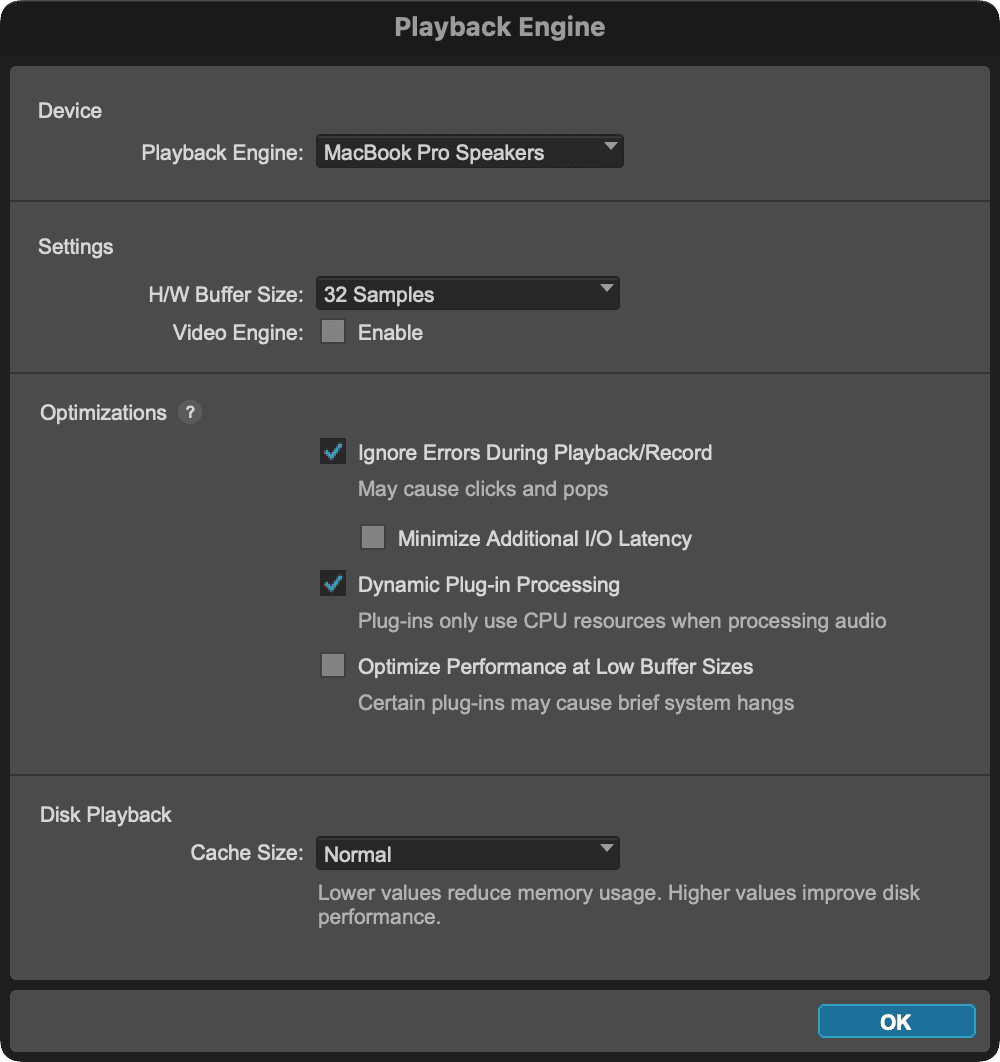
For this example let's create a simple macro to open the Pro Tools playback engine window.
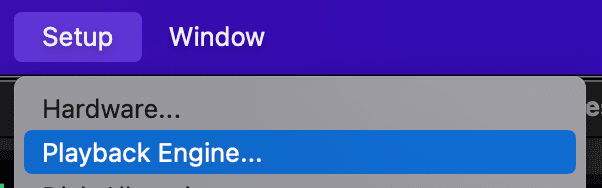
The manual steps we would take to open the playback engine would be to click the "Setup" menu in Pro Tools and choose "Playback Engine...", so our macro needs to be able to do that for us.
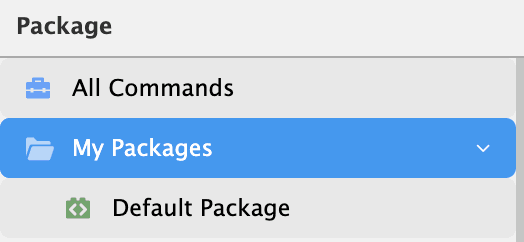
In SoundFlow all macros and scripts are stored in folders or what we call "Packages".
The first step is to select a package under the "My Packages" folder where you want to store your new macro.
If you'd like to create a new package you can do this by clicking the "New" button and then select "Package".
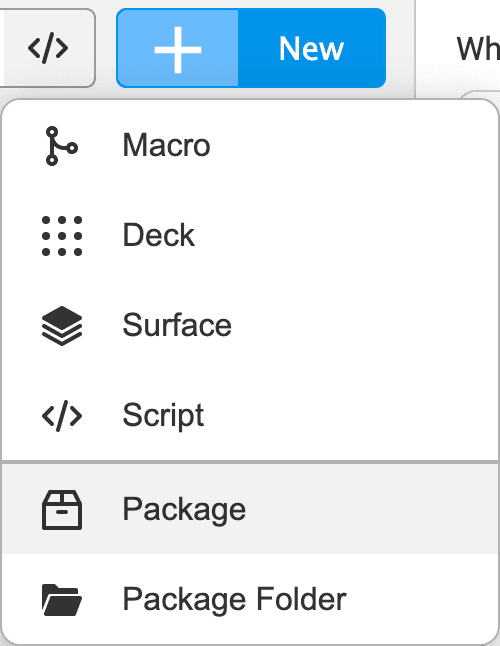
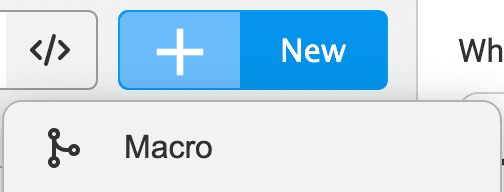
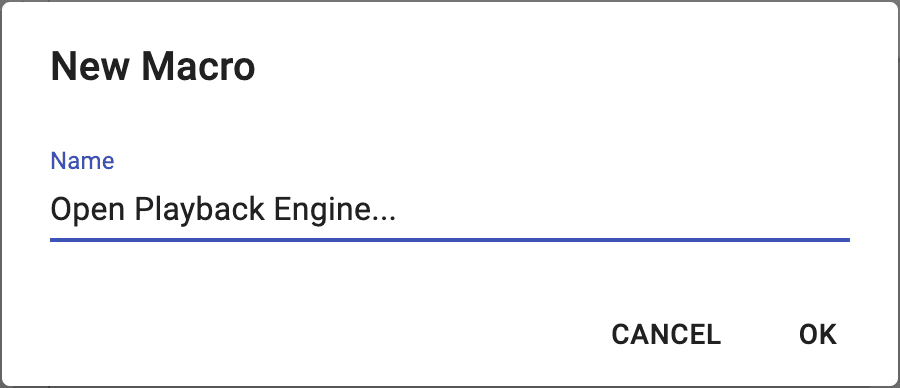
For this example I'll select my "Default Package" then to create my macro I click the "New" button in the top left and select "Macro" from the pop-up menu.
Let's name this macro "Open Playback Engine..." and click "OK".
Add a Macro Action
When the macro is selected in the commands list the bottom right section becomes the Macro Editor where you can add actions.
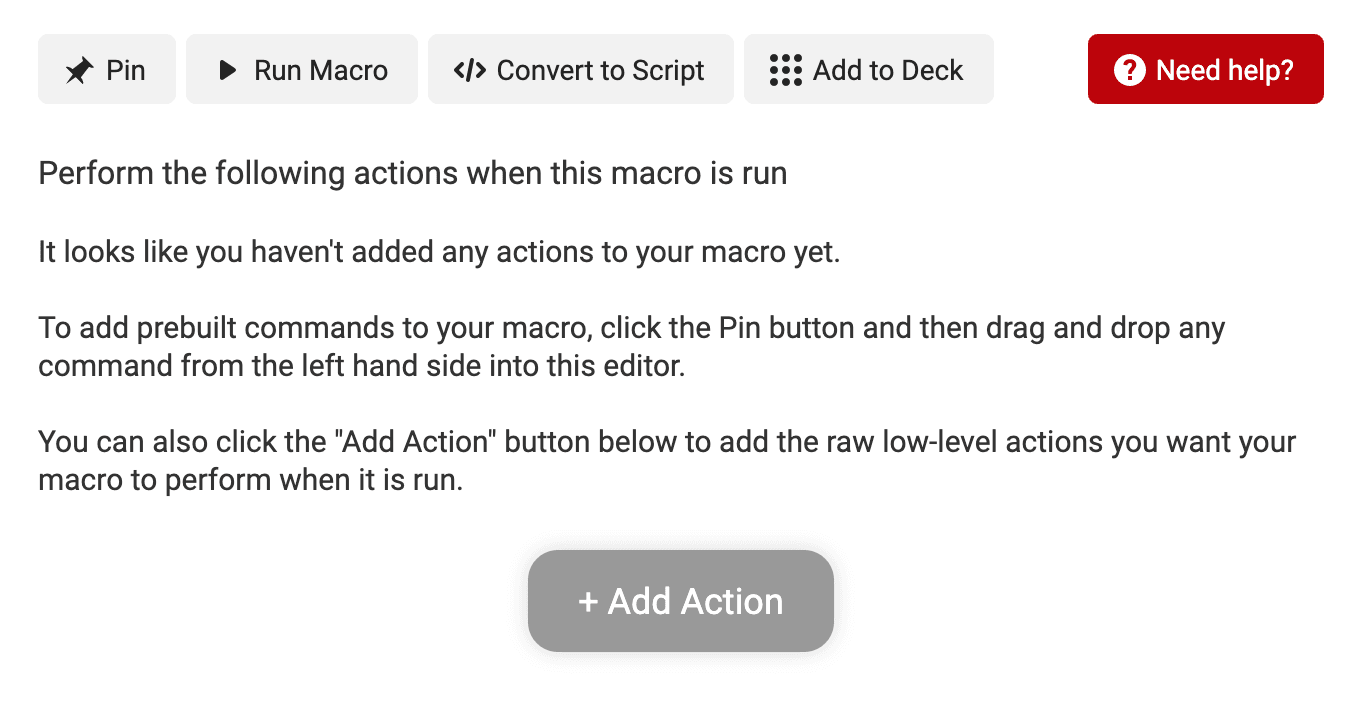
Actions are the building blocks of a Macro they define the individual steps that a macro should execute.
The section above the macro editor is where you can assign triggers to your macro.
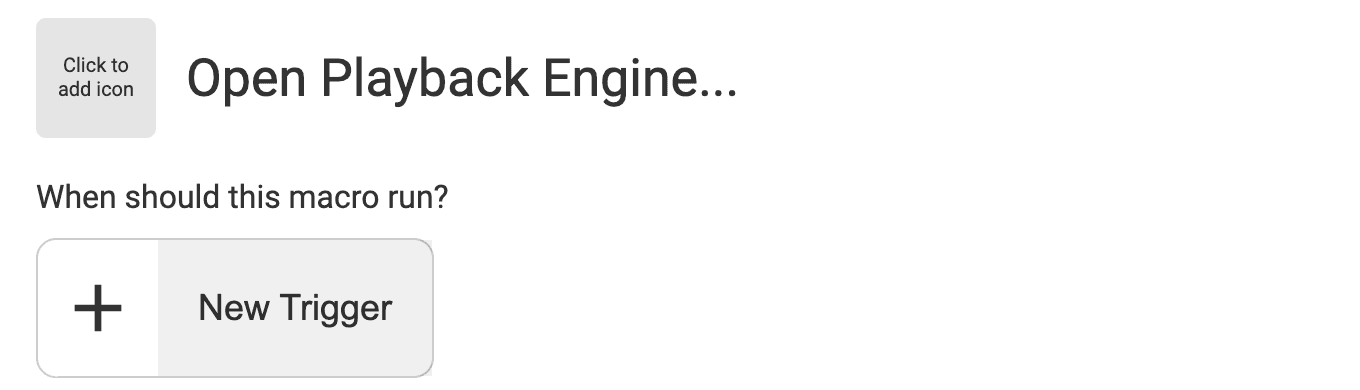
A Trigger in SoundFlow determines when a Macro should run. For example you can set your macro to be run whenever a keyboard shortcut is pressed or when a MIDI event is received. You can also use any other type of input available from the Trigger type options.
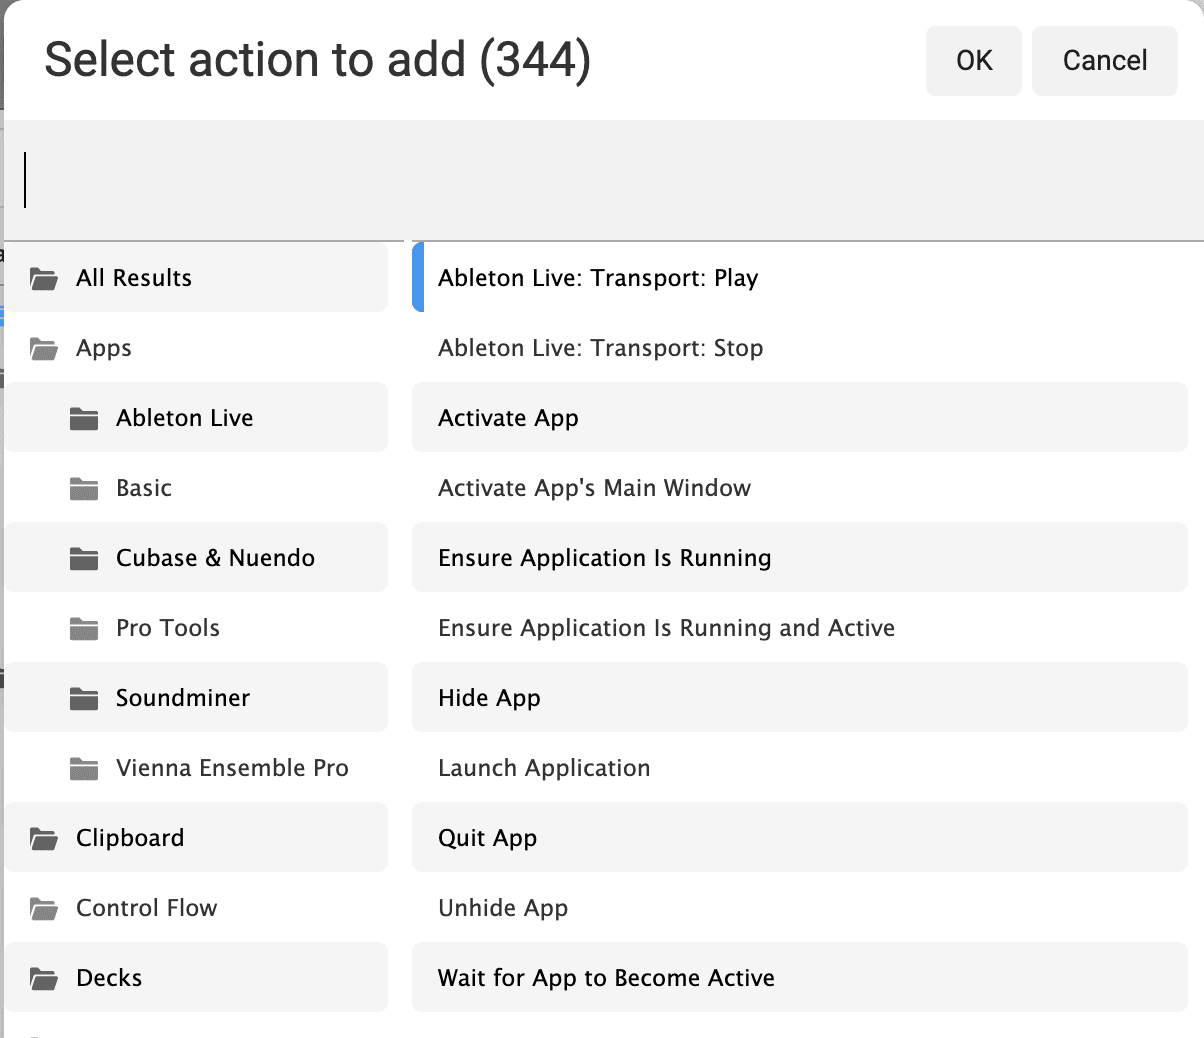
Now let's add an action to our new macro. you can do this by clicking the "Add Action" button.

This will open a list of Macro Actions we can choose from.
There are two ways to find the actions we're looking for, either by navigating through the actions category in the left column or by using the search field.
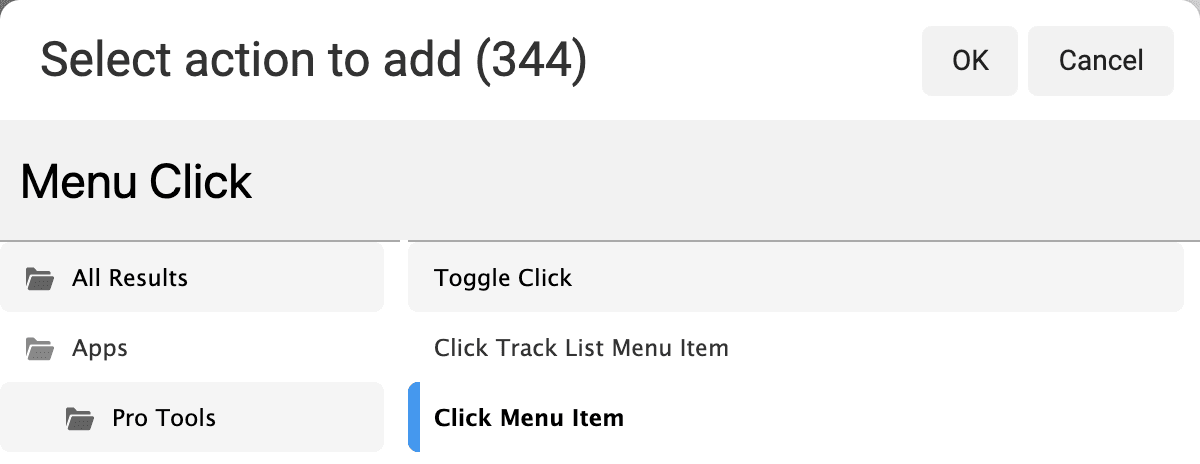
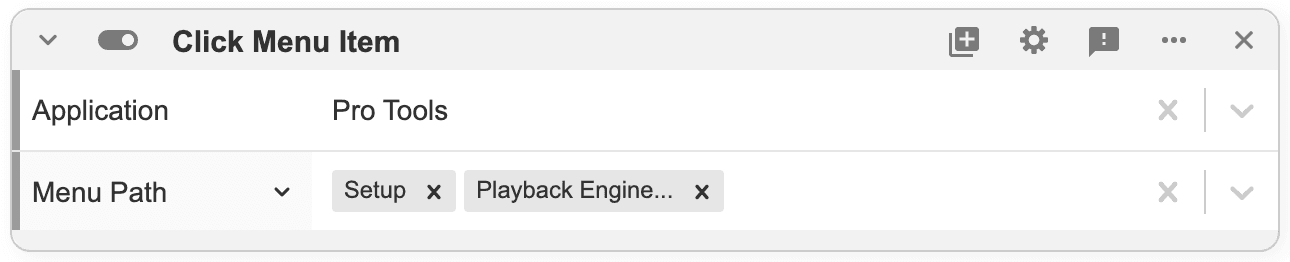
In this example we want to click a menu item. So let's select the User Interface or "UI" folder then the Menus and Popup Menus" folder, and then select the "Click Menu Item" action from the column on the right.
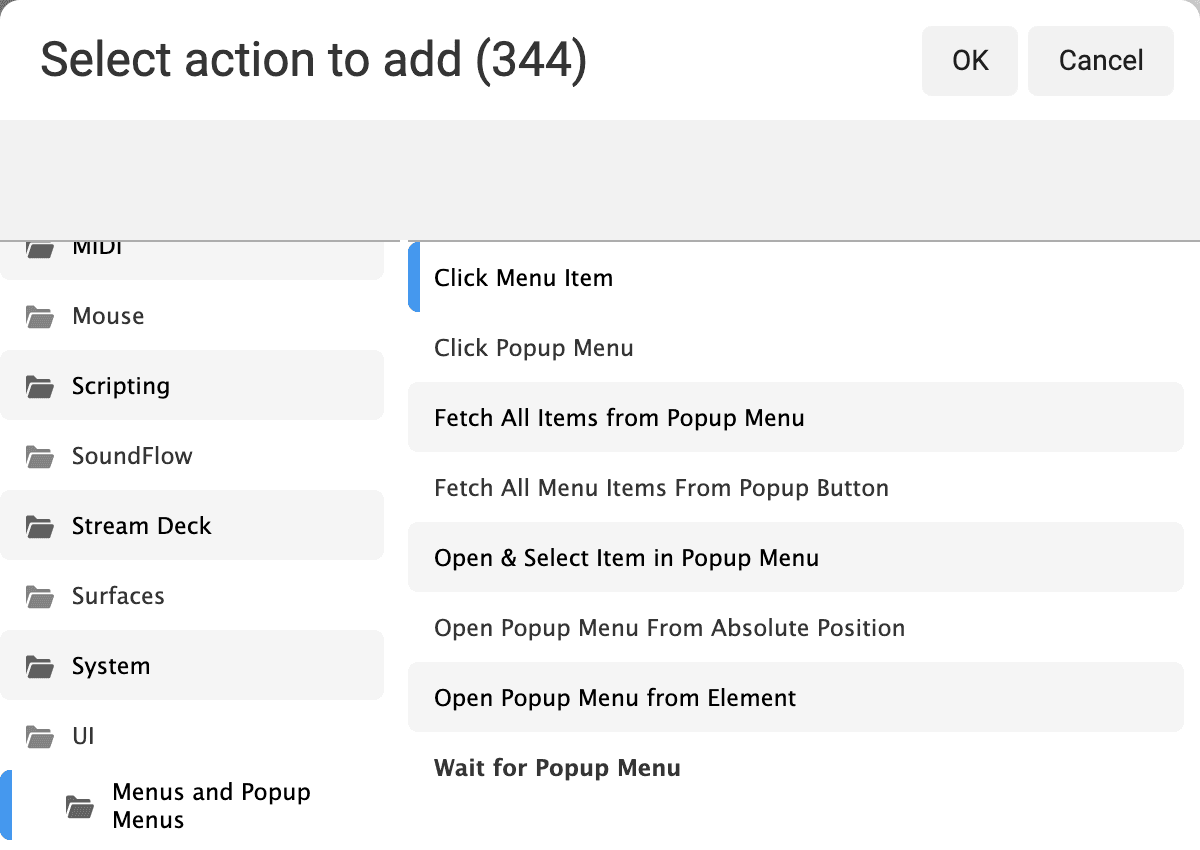
Or perhaps easier you can just start typing "Menu Click" and then select the click menu item action and press return.
Note: In this case finding the right action was easy but we know there's a lot of different actions to learn so if you have any questions about which one to use, please make sure to ask in the SoundFlow User Forum so we can guide you.
Configure Macro actions
Now that we've added a "Click Menu Item" action we need to configure it so it does what we want.
The "Click Menu Item" Macro Action has two properties that can be set.
- Application: This is the app whose menu we want to click
- Menu Path: This is the path from parent menu down to submenu describing which menu items should be clicked.
So for the "Application" property let's select "Pro Tools".
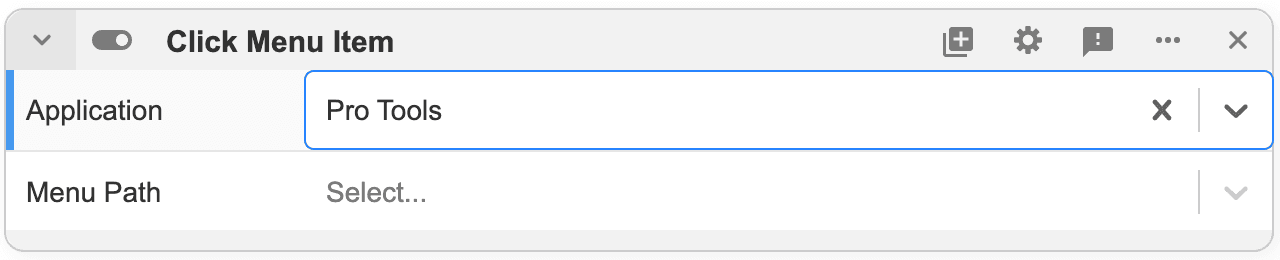
Next we need to enter the menu path so let's switch to Pro Tools to investigate.
As we've established, the menu path will be "Setup" followed by "Playback Engine...". If your menu selection requires you to select sub menu items, for example if you wanted to select "Setup", "MIDI", "MIDI Input Devices..." your menu path would consist of three steps, however in our case is just two, "Setup", "Playback Engine...".
Note: it's important to use the exact spelling capitalization and special characters of the menu path for the action to work correctly.
Next let's switch back to SoundFlow and for the Macro Actions "Menu Path" property enter the first part of the menu path "Setup" then press return, and then type the second, "Playback Engine..." and again press return.


This particular action works even if Pro Tools is not in focus, so if we move the SoundFlow window over, click the "Run Macro" button in the header of the Macro Editor as expected the macro opens the Playback Engine window.
In this example we're using just one Macro Action but if you wanted to create a more complex macro, the Macro Editor allows you to add multiple actions via the "Add Action" button.
Add a Keyboard shortcut
The next step is to assign a keyboard shortcut to the macro.
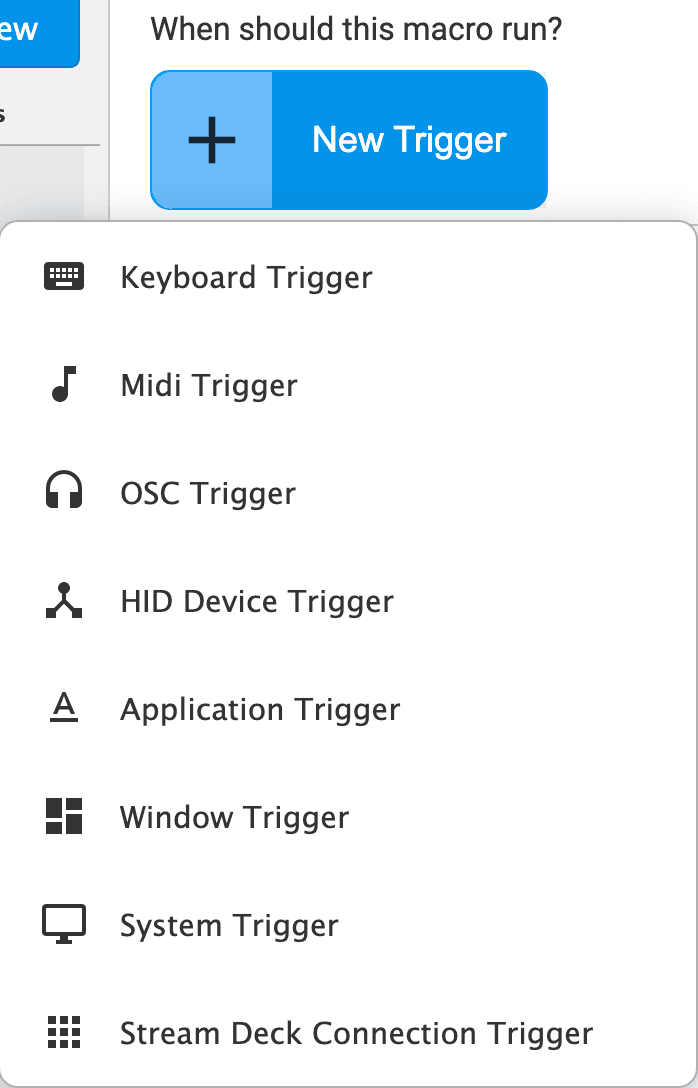
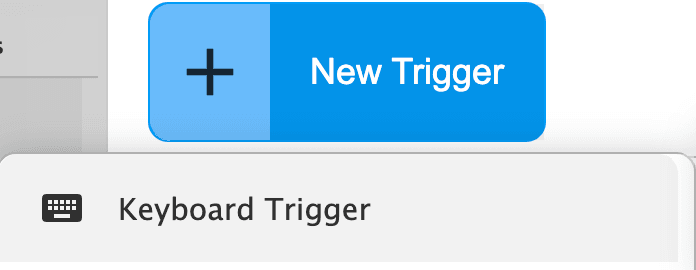
You can also have the macro triggered by any of the other trigger types, or even assign it to a Streamdeck button, but for now let's assign a keyboard trigger by clicking the "New trigger button and selecting "Keyboard Trigger".
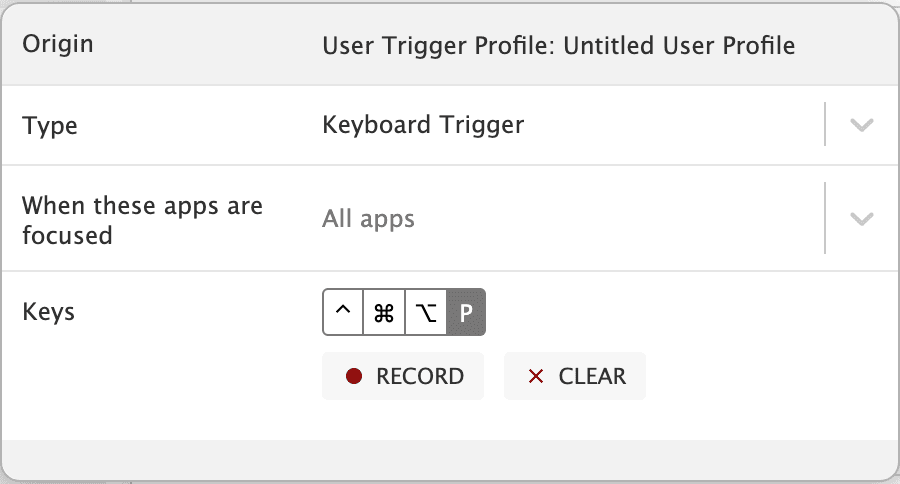
To assign the shortcut we want, Click the "Keys" property's "RECORD" button and then press the keybaord shortcut you want. In this example lets use "Control + Option + Command + P".
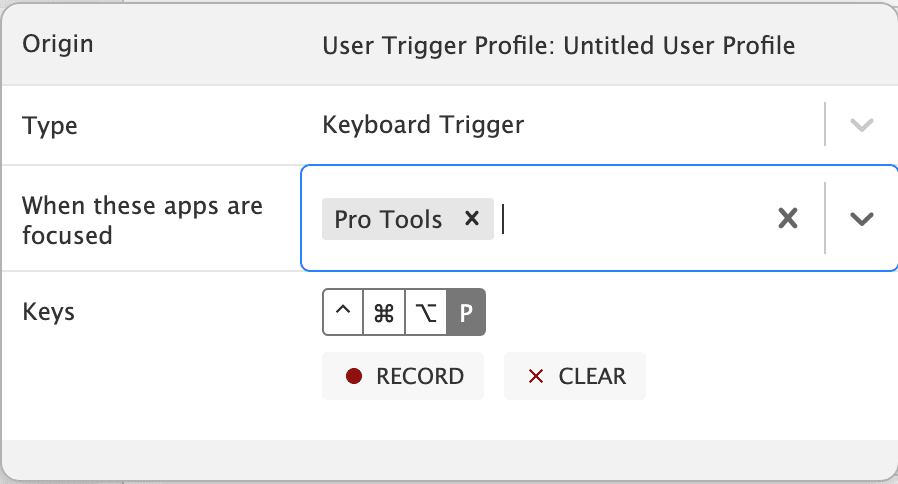
You can also limit the keyboard shortcut so it doesn't override the shortcuts in other apps so I'll assign the Trigger's "When these apps are focused" property to "Pro Tools".
Now if we switch back to Pro Tools we can use the shortcut and the playback engine window opens.
Convert to Script
The macro we just created was a simple case of executing a single action but if you need to build something with more complex logic you can do that with a SoundFlow script.
SoundFlow scripts are written in the JavaScript programming language, you can create a script by clicking "New" and selecting "Script".
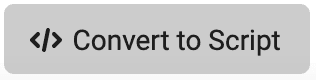
If you want to learn more about how to write scripts in sound flow a great place to start is by making a macro like we just did and then using the "Convert to Script" button.
This will create a copy of your macro, that is essentially the script equivalent of your macro. You can then use this as a starting point to write script commands with countless possibilities.
The original Macro looks like this:
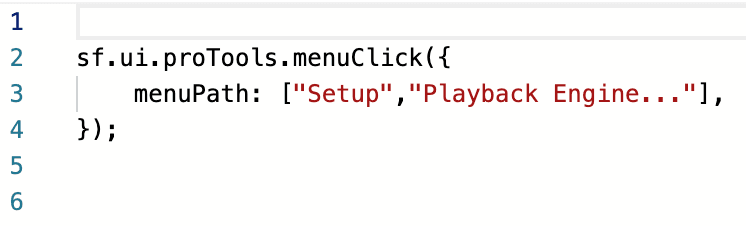
The Macro converted to Script form looks like this:
To sum up in this article we've learned how to:
- Create a macro.
- Add an action to a macro.
- Configure Macro Action properties.
- Add keyboard shortcut triggers to a macro.
- Convert a macro into a script using convert to script.